In this blog post I will show you how to set up your DFIR (digital forensics and incident response) log analysis rig, how to analyze logs in various programs and how to optimize your process to save time and effort.
Your Log analysis rig setup: Linux or Windows?
Well, I prefer Windows simply because most tools I need run on this operating system. “But I miss bash, grep, cat, cut, awk, less, etc” – no you don’t. You did not know they were available outside of cygwin, that’s it. Here you go, go ahead and install: GOW and CMDer – these two will solve the problem of your Linux blues. The first one installs the binaries, the second one fixes the issue of the hideous Windows CMD shell (but check out its preferences, ok?).
From this point on you have no excuses if you prefer manual log analysis – but let’s move on with the easier stuff first. I love usability.
Logs can be huge – and analyzing a 500MB or even a 1-2 GB log file can quickly get daunting and tiring. Going through such a file to find a single instance of the right command which got your server compromised could be an all-nighter. Let’s make it 15-45 min., shall we?
Let’s first set up our task:
Head over to https://honeynet.org/challenges/2010_5_log_mysteries and download some logs. Specifically, this file. Following the challenge, we will complete it in several programs utilizing a few useful filtering techniques. If you disagree with me or have suggestions, feel free to post them in the contact form on my website – I will be happy to amend my article or reply with my thoughts.
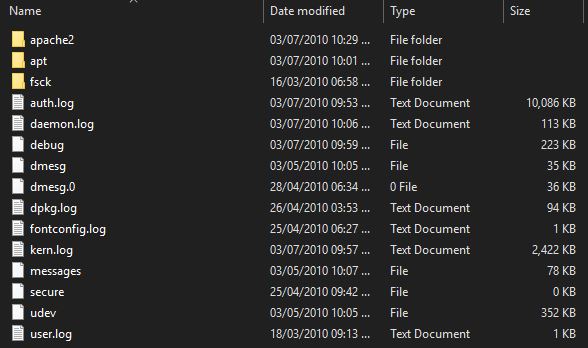
Extract the archive and look around.
 From the list we could see immediately the log which could interest us – auth.log
Our objective will be to answer the challenge’s questions with the programs below.
For our exercise, we will need:
1. Quick Filtering with Mandiant Highlighter
I hope Mandiant (FireEye) keeps this tool, if not updated (gosh, they have not updated it in ages!), at least online for long enough for a sane developer to develop something modern and at least as useful and much more stable. From the frequent crashes I’ve experienced with it I would only recommend it for files less than 100MB in size. Anything bigger and some complex tasks simply kill the program. Yes, it can open huge files – but opening is one thing, complex filtering is another.
 On opening the auth.log file with Highlighter we see it contains 102165 lines. Not realistic for reading the whole thing, so let’s get rid of the lines we don’t want to see.
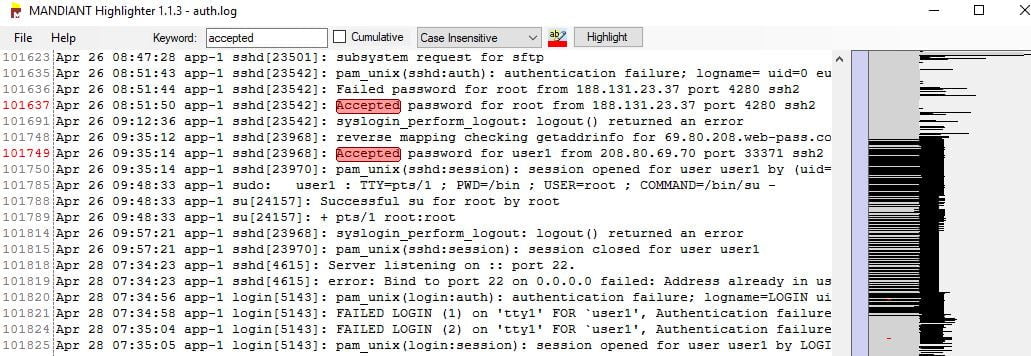
We accomplish this by glancing over the file, scrolling from top to bottom and noting any lines which are frequent and useless at the same time. For example, we would be interested statistically in what usernames were attempted to login to ssh, but if they were invalid they pose no interest to us. So we could search for “Invalid user“, select the 2 words, right-click and select “Remove” which would remove all lines containing them. This removes roughly 13 000 lines, or more than 10%. We can do the same for “Failed password for invalid user“, ” authentication failure”, (so far 50% of the log file has been filtered out), “user unknown”, “check pass; user unknow”, “Failed password for root from“, ” Failed password for”, ” session closed for user” (because we might not be interested in logouts as much as in logins, right?). Even so, we see a line containing “session opened for user root” – and we might be more interested in “Accepted password”, instead – so we remove even the session opened lines.
One more string to remove is “POSSIBLE BREAK-IN ATTEMPT!” – this alert sounds scary but is not very helpful in identifying actual breaches, unless we see a successful login attempt from the same IP later on (which is a part of a deeper statistical analysis).
2. We are left with a whopping 1747 lines!
All that in just a few seconds of filtering. Neat, especially knowing that we can reclaim any lines removed from the GUI (right click, Line operations – reclaim lines previously removed).
The remaining line allow us to build a timeline of events and the commands used to compromise the server and answer all questions in the challenge above.
That is with just one function of Highlighter – “Remove”! Let’s not forget we can highlight different things with different colors to make our analysis easier:
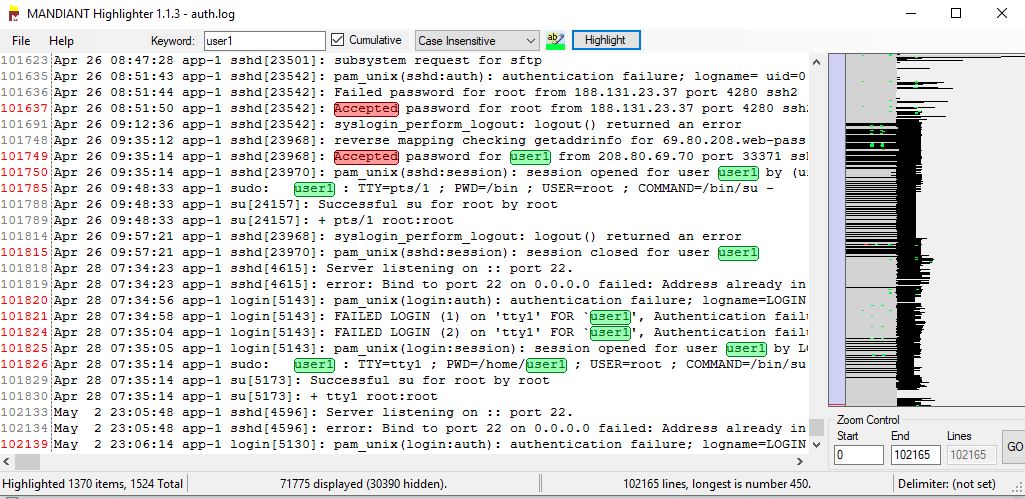
For example, we see a lot of instances of commands and actions from “user1”. We go to Keyword, enter user 1, select “cumulative”, “Case insensitive”, change the color to a distinctive one, press “Highlight”, voila!
 We can do the same for “Successful su for nobody by root”, “Successful su for www-data by root”, “Successful su for www-data by root” (3 hits), “Accepted password” (with a RED color and we found 118 hits), rinse and repeat for all strings which pose interest and would help us solve the puzzle.
The filtered screens/results can be used in presentations to management and reports and is much better than simple text excerpts.
You can also experiment with selecting a string (for example, a user or an IP address) and selecting “Show only” – which filters out everything except the selected string. If you have one suspect this allows to quickly narrow your view to just their actions, temporarily.
3. Now let’s repeat the filtering that with Notepad++
Why notepad++? Because analyzing logs with highlighter is easy, but it often breaks with exceptions and errors and with very large files tends to die completely. Some things are better done in a more stable program and there are a few very useful plugins for Notepad++ for log analysis.
Let’s open the same file in this program and see if we could repeat the same filtering with it.
Select a string you wish to filter out (altogether with the whole line it is on), press Ctrl+H:

add .* before the string and .* after the string, so it would look like .*string.*, then select “Regular expression” and click Replace All. This will remove all lines containing your string, leaving an empty line instead.
These blank lines can easily be removed using a Notepad++ plugin (if missing, install it with Plugin manager): TextFX -> TextFX Edit -> Delete Blank Lines (select all text first).
4. Notepad++ color highlights
Next, we will use the guideline from https://darekkay.com/blog/turn-notepad-into-a-log-file-analyzer/ to create the same colorful highlights as in Highlighter, but Better! Because we can have the highlights automatically done for us, depending on keywords, every time we open the same type of log file, without having to re-define them and re-highlight again.
The result:

The technique is especially useful for more complex logs (for example, when analyzing an MFT table from a Windows operating system) and searching for multiple IOCs (indicators of compromise) – highlighting key values on file opening and selecting your custom language (you can define separate languages per log / file type) saves a ton of time.
5. Working with LogExpert to repeat the same analysis
In my opinion this program is the least efficient in terms of speed of the three – but I’ve seen the least amount of crashes with it and it also has some unique features like time syncing and tail-ing a live log file while filtering which are not present anywhere else. That is why you will benefit from learning how to use it, when the time comes to use these specific features.
Before you proceed, I recommend you view the following video:
For me, being able to open a new tab from the filter I choose enables me to have multiple views of the same log file depending on the different information I want to extract from each tab. For example, you could extract the actions of 10 different IP addresses or users in 10 different tabs and compare them.
6. Filtering in LogExpert
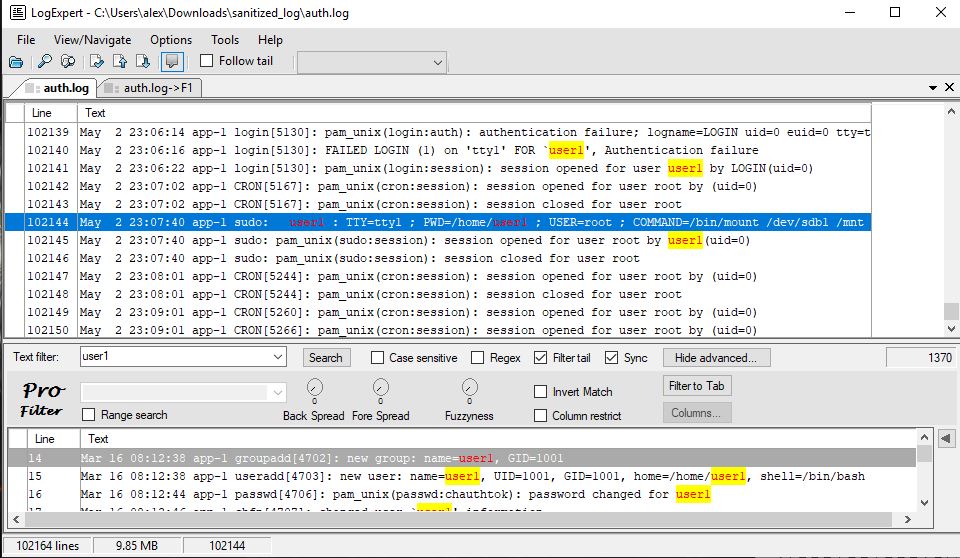
Double-clicking on a line enables you to select strings to search on. Right-clicking on a word or two allows you to choose to filter for the current selection (or press Ctrl+F), which opens a lower pane with the selection already filtered.
 But that is not all. When you click the Show Advanced button, you can select “Invert match” and click on Search again – which essentially is the same as removing all lines containing that text and filtering them out. Then you can click on “Filter to tab”. After just a few iterations of selecting more unneeded text, invert filter searching and filtering to a new tab we are left with roughly 2000 lines – just as with the examples above, and can do our analysis in a cleaner environment.
If you keep the tabs open you can come back and change your filtering ideas, open new tabs – the program is very memory efficient and will not slow your computer down with multiple tabs open.
7. Highlighting with LogExpert
In Options > Highlighting and triggers, by editing the default group, you can do the following:
type your search string, select the foreground and background colors and click on Add. Now lines containing that string will be colored as per your selection.
Windows Log Analysis
A really nice program is described in detail here – http://www.ghacks.net/2016/03/22/logwizard-windows-log-viewer/ – and I would recommend you to read that article and try the program out. It is one of the few free ones with that much functionality.
Now… for the star of our show:
EM Editor!
EMEditor is the best text editor I have found in my DFIR career. If you need to open files up to 240 GB in size and easily search in them, that is the tool for you.
From now on you will be able to utilize your newly learned skills to glance over, filter and analyze huge files more effectively. This applies to security logs, MFT listings, anything which requires getting rid of large chunks of useless information in order to find the needle in the haystack. Essentially, what you’re doing is marking all hay as hay and filtering it out – leaving you with a few strands of unknown material and your needle!


